|
|
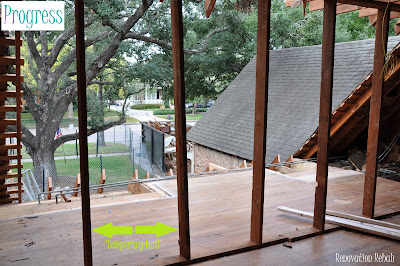
This remodeling business is not for the faint of heart. You can see in the picture above that the crew has also removed the old cedar siding above the garage, which will be replaced with Hardy Plank. Here is closer view of the new exterior wall and the hole for the new dormer.
|
|
We extended the first floor's exterior wall in order to relocate the stairs (the blue prints are here and here). We are replacing the front door and will add side lights. We are also able to put in two large windows in the dining room. In the picture on the right, you can see the location of the new front door (the hole on the left) and the placement of the two dining room windows (the two large holes on the right). And the picture on the bottom is a close-up of the location of the new dining room windows.
|
|
Here is some of the carnage from the demo…these used to be the old single-pane windows in the dining room. Can't wait to see the new ones!
Now let's step inside. The picture on the left is the dining room before the extension, and the picture on the right is the dining room and entry after the extension. You can see where the old exterior wall used to be based on the floor in the dining room and entry. The walls in the middle of the room are two temporary walls (which are currently supporting the second floor) and will be removed.
|
|  |
Now, let's chat about the new dormer. We are enlarging the dormer for two reasons. First, the room where the dormer is located is the game room. Before the renovation, the game room was a large room measuring approximately 15' by 22'. However, the front third of the room was not usable space because the roof is angled (which makes for a very low ceiling in the front third of the room). This effectively made the room 10' by 22' (super long and skinny). Enter new dormer (and see the blue prints here). By adding the new dormer, not only are we are able to extend the exterior wall of the game room five feet (which lines up with the extended first floor exterior wall and increases the game room to 20' by 22'), but now we will have 8 foot ceilings throughout the game room (which effectively gains us 10' in the room – the 5' extension + ability to use the 5' of the previously unusable portion of the room). The pictures below shows the game room and the angled roof. The picture on the left is looking into the game room from the door and the picture on the right is taken inside the game room back looking towards the door.
|
|
On a side note, the walls of this room used to be covered with brown wood paneling and some sweet navy blue wall paper with a vintage colonial theme. Unforuantely, I don't have a picture, but the wallpaper below will give you an idea (just picture it with a navy blue background and add colonial drums between each of the eagles). When we first moved into the house, we removed the paneling and wallpaper, added the crown molding and the new window seat, painted the walls with Ralph Lauren suede, and painted all the trim dark brown. It was pretty painful to see all that work destroyed. But hey, sometimes you have to take a step back in order to move forward.
So back to today. The picture on the left shows the view of the game room from the new stairs. And the picture on the right gives you an idea of game room's old footprint and the space that the new dormer will create.
|
|
Here are some more pictures of the game room from the inside. I've heard of open concept…but this is rediculous! Sorry, I couldn't help myself.
|
|
These pictures show the game room looking back towards the stairs from the far wall of the game room. The picture to the left is before any demo and the picture on the right is today. You can see where the old door used to be located and where the new entrance will be in the picture on the right.
|
|
Here are our new stairs in action!
And some more views of the front yard from opening of the new dormer.
|
|
Oh, and here is a close-up of our lovely dumpster. We have unloaded this bad boy about 15 times already!
We'll be back soon with the progress pictures of the new guest bedroom!


No comments:
Post a Comment