Showing posts with label Lantern Tiles. Show all posts

Thursday, August 1, 2013

What Goes Up (My Walker Zanger Tiles)...Sometimes Must Come Down

Happy Thursday everyone! The weekend is almost here, so time to get ready for some fun! We are going to watch Bob Schneider tonight (he's one of our all time favorites!) and we have some birthday gatherings to attend this weekend...so it should be a busy, but fun one for us. I wanted to pop in real quick before the shenanigans start and give you an update on the master bathroom. As I mentioned in back in April, renovations do not always go as planned, and sometimes you can hit a bump in the road. So far our biggest bump was the H-U-G-E error that the builders, engineer and inspector made with the structural support for our house that could have caused the whole thing to come crashing down if any wind picked up...Eeek!!! Although that was more of a Mount Everest sized bump, we have had lots of other smaller bumps throughout this year-long renovation (some mountains and some mole hills). But we have somehow managed to either fix them or come up with work-around solutions...so my advise when doing a renovation, always try to stay nimble and look at those bumps as fun challenges to overcome instead of disasters that can ruin your day.  Our latest bump was the feature wall of Walker Zanger tile in our master bathroom shower. We were super excited to see it once it was installed, but when we got to the house, we realized the final product was not what we had envisioned.  Here's a picture of what it looked like installed with some notes highlighting the issues:
 
 
The first issue was that the area with the Walker Zanger Ashbury Tiles were too small (we'll call them the "Walker Zanger squares")...I love this tile, so wanted to have as much of it as possible on that wall.  Second, the field tile (which is the travertine tile) was not centered on the Walker Zanger squares.  I am totally "Type A" and saw this as soon as we walked in the room.  Although it might not seem like that big of a deal to some people, I knew this would drive me absolutely batty every time I saw it.  And the third issue is that the space between the two Walker Zanger squares is too wide. Although the Walker Zanger squares are centered above and below and the chair rail, this made the bottom Walker Zanger square feel too low and stubby.  But the good news of this pic is that our tub has arrived!  It hasn't been installed, so isn't in the correct location, but I am in L-O-V-E with this cast iron beauty! I don't know about you, but I think that claw foot tubs are super sexy, MEOW (see there is a silver lining to every storm cloud)!!!  But I digress, so here is a basic sketch of how we plan to fix the tile issue:
 
 
1. Widen the Walker Zanger squares by 2.5 tiles on each side
2. Make the top Walker Zanger square go all the way to the top tile
3. Make the space between the two sets of Walker Zanger squares smaller
4. Center the field tile (i.e., the travertine tile above and below the Walker Zanger squares)
 
So here we are today at the beginning of the "fixing stage" with the border tiles removed. Breaks my heart!!!
 
 
Oh well! The quicker we rip this band-aide off, the quicker we will be one step closer to finishing this project. Good times!!! So that's all for now. Thanks for stopping by and have a wonderful Thursday!!!


Monday, May 6, 2013

Shopping for Granite and Carrara Marble

This weekend Matt and I did some of shopping and selected our granite and carrara marble slabs for the Guest Bath, the Master Bath, the Game Room Bar and the Living Room Built-In next to the fire place.  All of the cabinets for these rooms are stained a dark java color.  Here are a few of the cabinets for our Master Bathroom vanity post-delivery but pre-installation. 

 
All of the cabinets in our house are from Starmark Cabinetry that we ordered from a store called Factory Builders Store in Houston.  This is the same brand of cabinets that we used in our kitchen and absolutely adore the quality, finish, and detail that these cabinets provide.  (Oh and P.S., I have not been paid by either of these stores, but if anyone that works there is interested, please don't hesitate to contact me :-) ).  In the Master Bath, Living Room, and Game Room, we are going for more of a rustic look, so we chose the Rustic Cherry wood for the cabinets.  Rustic Cherry wood is different than plain Cherry wood because it shows natural holes and wear in the wood. 


Here


This is the same finish that we used for our kitchen cabinets.  However, we chose the Java stain for the Master Bath, Game Room and Living Room built-in, which is a bit darker than the sample cabinet above.  Java is effectively a super dark brown stain that looks nearly black, but still gives you the richness and warmth of a deep brown cabinet.  Also, it allows you to see the wood grain, which we would loose if we painted the cabinets black.


Here


Here is a closer look at our Master Bath vanity cabinets.


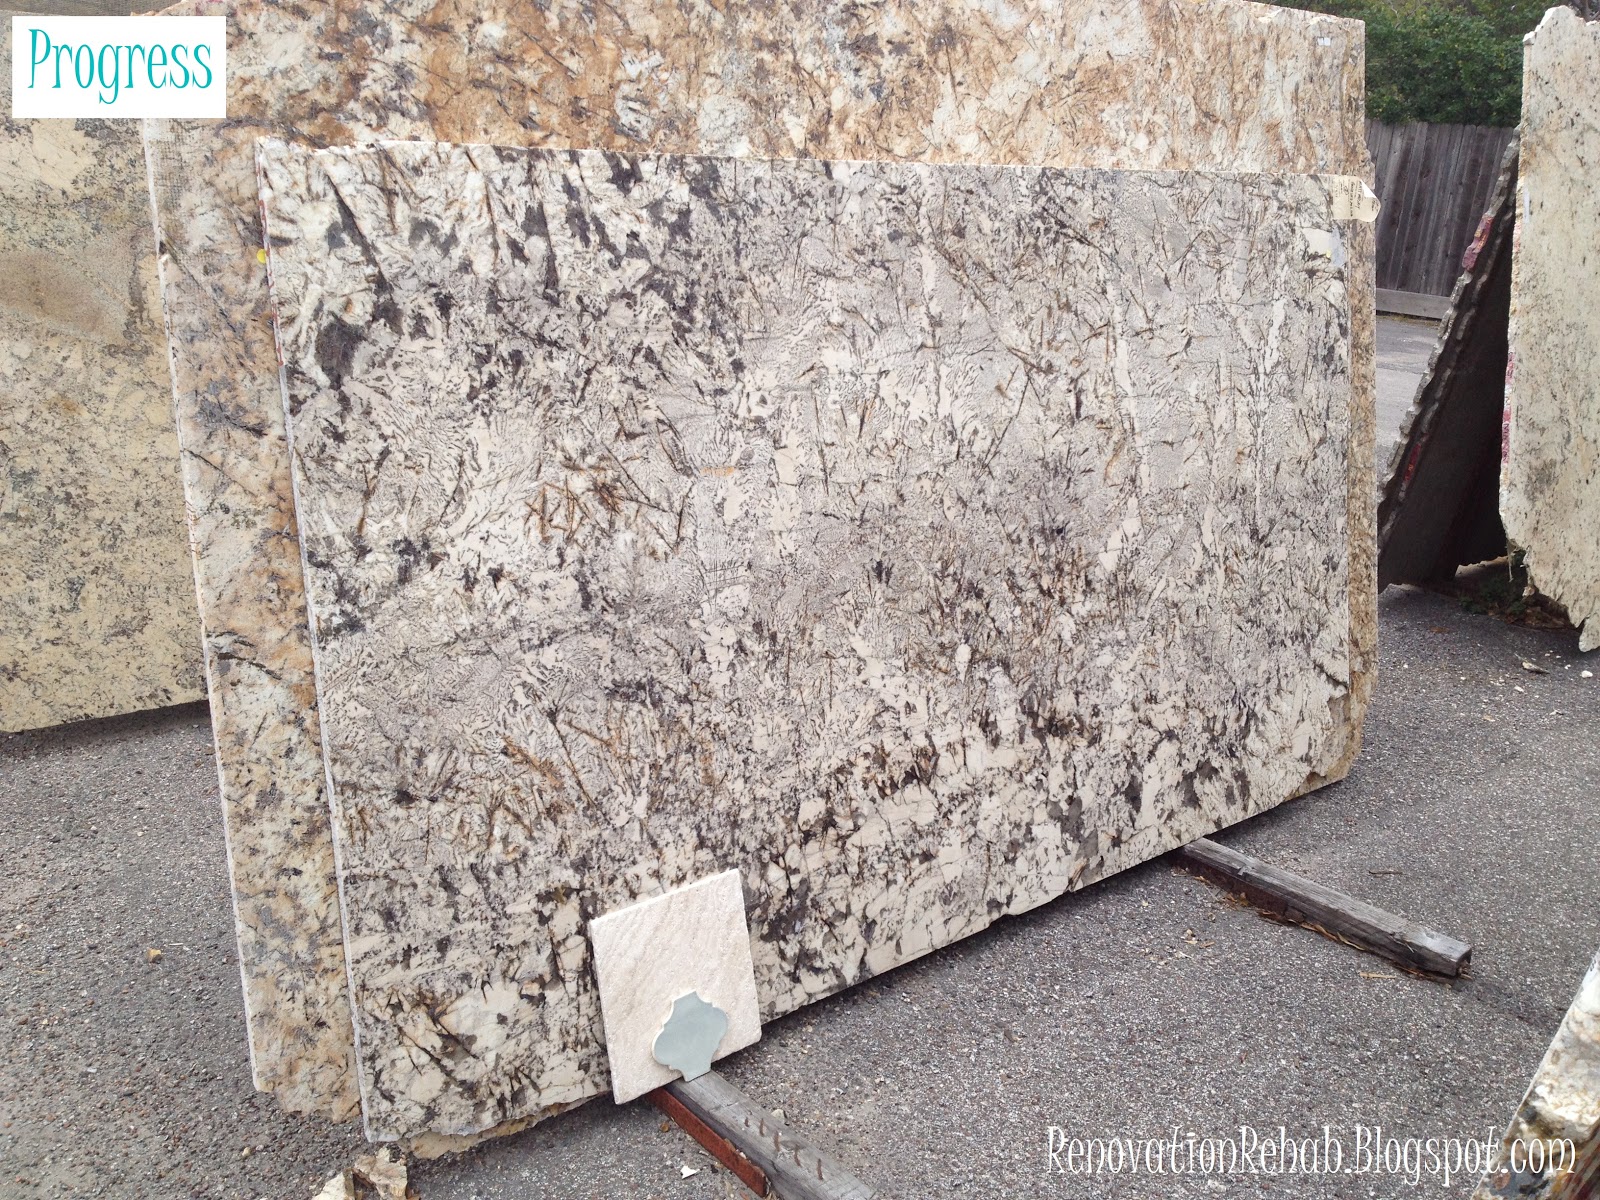
Since we are going for more of "elegant-rustic" look in the Master Bathroom, Living Room and Game Room, we were hunting for a creamy piece of granite with some dark accents throughout.  We found first found this piece of Delicatus Granite that we feel in love with.


The two pieces of tile in front are samples of the travertine tile and accent tile that we are using in the Master Bathroom.  The colors don't match that well in this picture, but in person they are spot on.  Unfortunately, however, this slab is only big enough for our Master Bath Vanity (it's 10 foot long).  They had another piece, but we didn't like it as much.  Although that was a bit frustrating at first, we quickly realized that we were excited about the idea of having different styles of granite throughout the house.  So we decided to keep hunting to see if we could find something similar but different.  After a bit of searching, we found this slab of Genesis Granite, which has the creams and brown tones that we need to match the built-in cabinets in the Living Room and Game Room, but is distinctly different than Master Bathroom slab. 


However, what makes this slab extra perfect is that it has some tiny specs of Maroon throughout...and for my die-hard Aggie husband, that was all he needed to be sold on the piece.  Next on our list was the Carrara Marble for the Guest Bathroom. We are going for an classic late 1900's early 20th century look for this room.  Here is my inspiration board that I showed y'all when I first revealed the Guest Bathroom plans.

 
As you can see, this bathroom is all about Carrara Marble.  We are going to use it on top of the cabinets and on the floor tile.  After wander through the warehouse, I quickly realized that all Carrara Marble is not created equal and the texture and color of the gray veining throughout the slabs can vary greatly.  It took some searching, however, we were eventually able to find a piece that matched our Bianco Carrara Marble floor tiles perfectly.


The slab was absolutely HUMONGOUS though!  As such, we only need about half of the slab for the guest bathroom vanity.  Since the granite store makes you buy the whole slab, however, we decided that we would use the remaining portion of the slab in the Laundry Room.  As I mentioned last week, I know its kinda crazy to use Carrara Marble in the laundry room...but since we would otherwise loose the remainder of this beautiful slab, we decided to throw caution to the wind and put it in the laundry room.  We are going to try and be careful with it, but I am just going to embrace the scratches or dings that will inevitably show up over time.  But hey, it will mean that it has been well loved and used. Well, that is all for our granite and carrara marble shopping trip.  I hope that you enjoyed it!  Thanks for stopping by and I hope that you have a great Monday!


Friday, May 3, 2013

Laundry Room Love Affair

 
Happy Friday everyone! Are you ready for the weekend? I sure am! Matt managed to score tickets to the Rockets game tonight, so look for us on TV (we'll be the ones in red and cheering for the Rockets...so super easy to spot right?).  Today I am here to tell you about an exciting new romance in my life...and no, it's not another man, but a room full wonder, excitement, and mystique that I have fallen head-over-heals, blow-me-away, going absolute gaga, in love with...our new laundry room!  I pretty much turn into Tom every time I walk by the little beauty. 

Here
To help you understand why I am so excited about my loverly laundry room, I have to take you back and show you what our old garage "laundry room" looked like before the renovation started.  Here she is...try not to be too jealous:


Yeap...it was effectively a washer and dryer in the garage (oh, and the cute little shelf that Matt DIY'ed so that we would have a space to put the detergent and hangers).  So in other words, we had no laundry room. At first I didn't think that it would bother me too much since the garage is attached to the house and it wouldn't be difficult to get to (Matt, on the other hand, would tell you that is because I don't do laundry...but I do, just not as often as I should...and maybe I have been known to go to to the store to buy new socks and skivvies instead of taking the time to wash clothes...but hey, a girl's gotta do what a girl's gotta do, and isn't shopping so much more entertaining than laundry?).


However, after just one load of laundry where everything could not go in the dryer and had to be air dried, I realized we were in trouble because every possible hanging location in the house was covered with drying laundry and this is what the inside of our house effectively turned into on laundry day:

Here
...which, on certain days, felt like you had just stepped behind-the-scene onto a Victoria Secrets photo shoot...quite the conversation starter when company unexpected turned up.  Good times!  So, long story longer, we quickly realized that we were in desperate need of an actual laundry room inside our house.  A few months ago I explained how we were able to create space for the laundry room, but just to remind you, the laundry room will live on the second floor between the landing and the game room.  You can see it highlighted in yellow on the floor plan below.


It is a pretty big room and we decided that it would function best to have the washer and dryer and a floor to ceiling cabinet on one wall. I also wanted space to dry clothes above the washer and dryer..so came up with this layout:


On the other wall, I wanted to have lower cabinets with a sink, upper cabinets and open shelves. Here is a mock-up of my design for this wall...just imagine that there a is a sink in the middle base cabinet:


We decided to install shelves between the two upper cabinets instead of an actual cabinet to allow for more room to hand wash big ticket items in the sink like duvet covers. Also, although I played around with the idea of lantern tiles and some fun floral tile, I have ultimately decided to go with classic beveled subway tiles.  I love the clean look they give...and since this room has no windows, I thought they would help keep the space bright and airy. Here is what the tiles will looked like when they are installed:

Here
 
 And here is the faucet that we have picked out for the space.

I love the fact that the high goose neck will give me additional space when washing items in the sink. The spayer will also help wash away any soap on the garments.  We are also using carrara marble for the counter top, so we picked the polished chrome faucet like the picture (and I know most of you probably think that I am nuts for putting carrara marble in the laundry room, be we are using carrara marble in our guest bath and had a lot left over on the slab...so instead of letting it go to waste, we decided to use it in the laundry room...scratches be dammed!). And this is the sink that we chose. 

Here
 
It is a Blanco sink and is actually made of pulverized granite. This means that it will never scratch (like how cast iron sinks can get scratch up). It is also super deep...which, if you are seeing a pattern, will also help with hand washing garments.  We even have the cabinets installed now (happy dance)...here are the upper cabinets after they were delivered:
 

And here is the sink cabinet and the floor-to-ceiling cabinet that will go next to the washer and dryer:

 
And now for the big reveal. This is the sink-side of the laundry room....love!!!
 
 
 And this is washer and dryer side of the laundry room with the shelf in place that will sit above the washer and dryer.
 
 
 Oh I am so freak'n excited with how the room is turning out! And I ain't going to lie...I have spent way too much time doing the Carlton in this space:
 
 
So let's take one last look at the before and after of our laundry room before we go!
 

Next up, granite, tile and paint.  I can't wait to see how she turns out when we are complete!  Thanks for stopping by and have a wonderful weekend!!!


Tuesday, January 8, 2013

Tiling Decisions….

One of my absolute favorite additions to the house is our new laundry room. Before we started the renovation, our home had no laundry room and our washer and dryer lived in the garage. This was not that big of a deal since it is just Matt and me at the moment. However, the thought of having no laundry room with children made me extremely nervous…not so much the need to go outside to do the laundry, but the fact that we would have nowhere to sort, fold, iron, etc. all the mounds of laundry that come along with children's multiple costume changes. But thanks to the decision to move the stairs, we now have a perfect location upstairs for a fairly large laundry room, which you can see highlighted in yellow below:


On one wall we will have our washer, dryer, a hanging rod above to dry clothes, and a large floor to ceiling pantry to store all of our clothes washing accoutrements:


The opposite wall will include a sink, lots of built-in storage, as well as folding and sorting space above the lower cabinets:


I am so excited about all the storage and folding space that we are gaining. Since this room in an interior room with no exterior windows, we have to be contentious about our color palette to make sure the room doesn’t turn into a dark hole. To accomplish this, we have picked white cabinets to help keep the room nice and bright since they will be the dominate feature in the room. The countertops will be made out of the remainder of our cararra marble slab from the guest bathroom. We also have red GE front load washer and dryer, which are a dream! These bad boys can handle a king size duvet cover without even flinching. LOVE IT‼! However, they do impact the rest of the colors that we can use in the room. I need to hit the fabric store for inspiration…but have a few options that I am considering. First is a grey, white, and yellow pallet with a pops of red. I found these great lantern tiles as a possible option for the backsplash:


I love the shape of the tiles and think they will bring a lot of interest to the room. I also plan to add a tile "floor mat" like picture below in the center of the laundry room:


I know this is a bathroom, but it gives an idea of the direction I am heading. I would create the "floor mat" with these tiles surrounded by a simple thin grey boarder and large white porcelain tiles:


I would bring in pops of yellow and red with baskets on the two open shelves above the sink as well as other accessories and fabrics to help tie everything together. Here is an idea of how the tiles would look on both walls.


I might try to adding a boarder around the edge of the grey lantern tiles, like this:


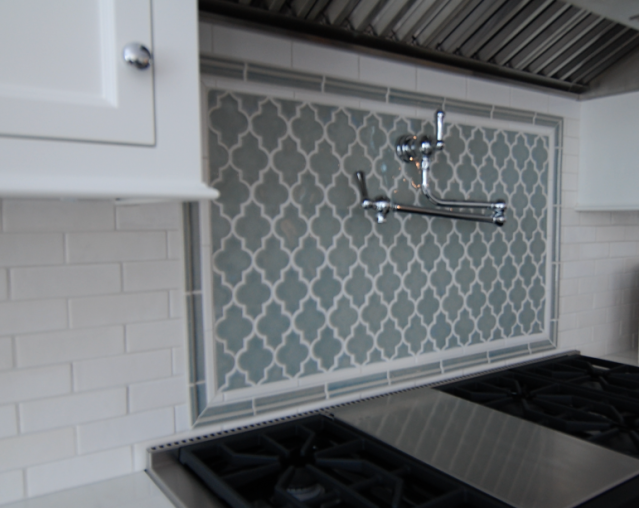
These are Walker Zanger Ashbury tiles, which are AMAZING‼‼ However, they are a bit cost prohibitive to use in our laundry room, but they are going to make an appearance in our master bath as part of accent wall in our shower (which I will show you that in a later post). But for now, let me just take another quick moment to daydream about these little darlings….I love, love, love these tiles!


The second color combination that I am pondering is black and white, with pops of red and yellow. In this case, I would use black lantern tiles for the backsplash:


And use this fun mosaic I found to create the tile "floor mat":


I love the little flowers on that tile and think that they would make me smile whenever I went to do some laundry. Like the other color combo, I would bring in pops of yellow and red through baskets, accessories and fabrics. Here is an idea of how the tiles would look on both walls:


I really dig the contrast of the black tiles on the white cabinets and think they will also pop against the cararra marble countertops. But then, another part of me just wants to go off the deep end of the color pool and use this FABULOUS tile I found at Home Depot:


If I use this tile as the backsplash, I would keep the floor plain white, bring in a super colorful rug and use a mixture of colorful accents. This tile makes just makes me smile! And if you are have to be stuck in a room with no windows doing laundry, why not bring the outside in to brighten you day?!?! Well, there we are for now. But I would love to hear what you think...which, if any, possible tile options do you like the best? Thanks for stopping by and I hope you have a fantastic day!


post signature

LinkWithin

Related Posts Plugin for WordPress, Blogger...