Showing posts with label Bathroom; Design and Oranization. Show all posts

Friday, August 30, 2013

Fireplace Makeover

 
Happy Friday! I hope that it has been a great week for everyone! Tomorrow is the first day of college foot and I couldn't be more excited (especially since Mr. Manziel is good to go and can start the second half of tomorrow's game - SCORE)!!! So fingers crossed that it will be a good game and not too sweltering hot (Bahahahahahah...not hot in College Station in August, good luck with that one). So much is happening at the house right now trying to get it ready for our move-in day. We passed the plumbing and electrical inspections today - WOOHOO!!! We also started the fireplace remodel. Here is what she looked like originally, right before we started the remodel:
 
 
The first problem was the massive hearth that stuck out about 16" from the front of the fireplace and wrapped around the side. Unfortunately, that was just way too much valuable real estate being wasted for me, so out it went! The second issue was the weird large cubbie to the right of the fireplace. Being from Houston where we might get one fireplace-worthy-day a year, Matt and I had no idea what that space was used for...and thought it was just a strange cubbie. We lived in the house for three years before one of my friends that lives up north happened to stop by and informed us that is where you are supposed to store your wood. Seriously??? How much wood does one person need (that's what she said)????  Here is what the fireplace looked like after we removed the hearth and added built-in cabinets to the right in the old wood storage cubbie.

 
Oooo, and gotta give a quick shout-out to the new floor color. I am so digging the dark chocolate brown. Yummy!!! So now back to the fireplace, the third problem came to light as the remodel progressed.  Although the Old Chicago brick was great in the house originally, it did not play well with our new cream walls, dark trim, and dark wood floors...it just came across too orange'ish-pink'ish-salmony (if that's even a color).  We first pondered white-washing the brick, but felt like that still wouldn't fit in with the rustic-glam look we are going for in the living room.  So we decided that our best option would be to cover the brick with dry stacked limestone. This picture below gives you an idea of what I am envisioning - a combo of elegant and rustic (and P.S. I L-O-V-E this living room, it is FAB!!!):
 
Here
So here's the game plan to beautify the fireplace and bring it in line with our current decorating scheme:

1. Remove massive hearth
2. Pick out limestone
2. Cover Fireplace with dry stack limestone
3. Add new rustic/reclaimed wood mantel
4. Add plug and cable for future TV
 
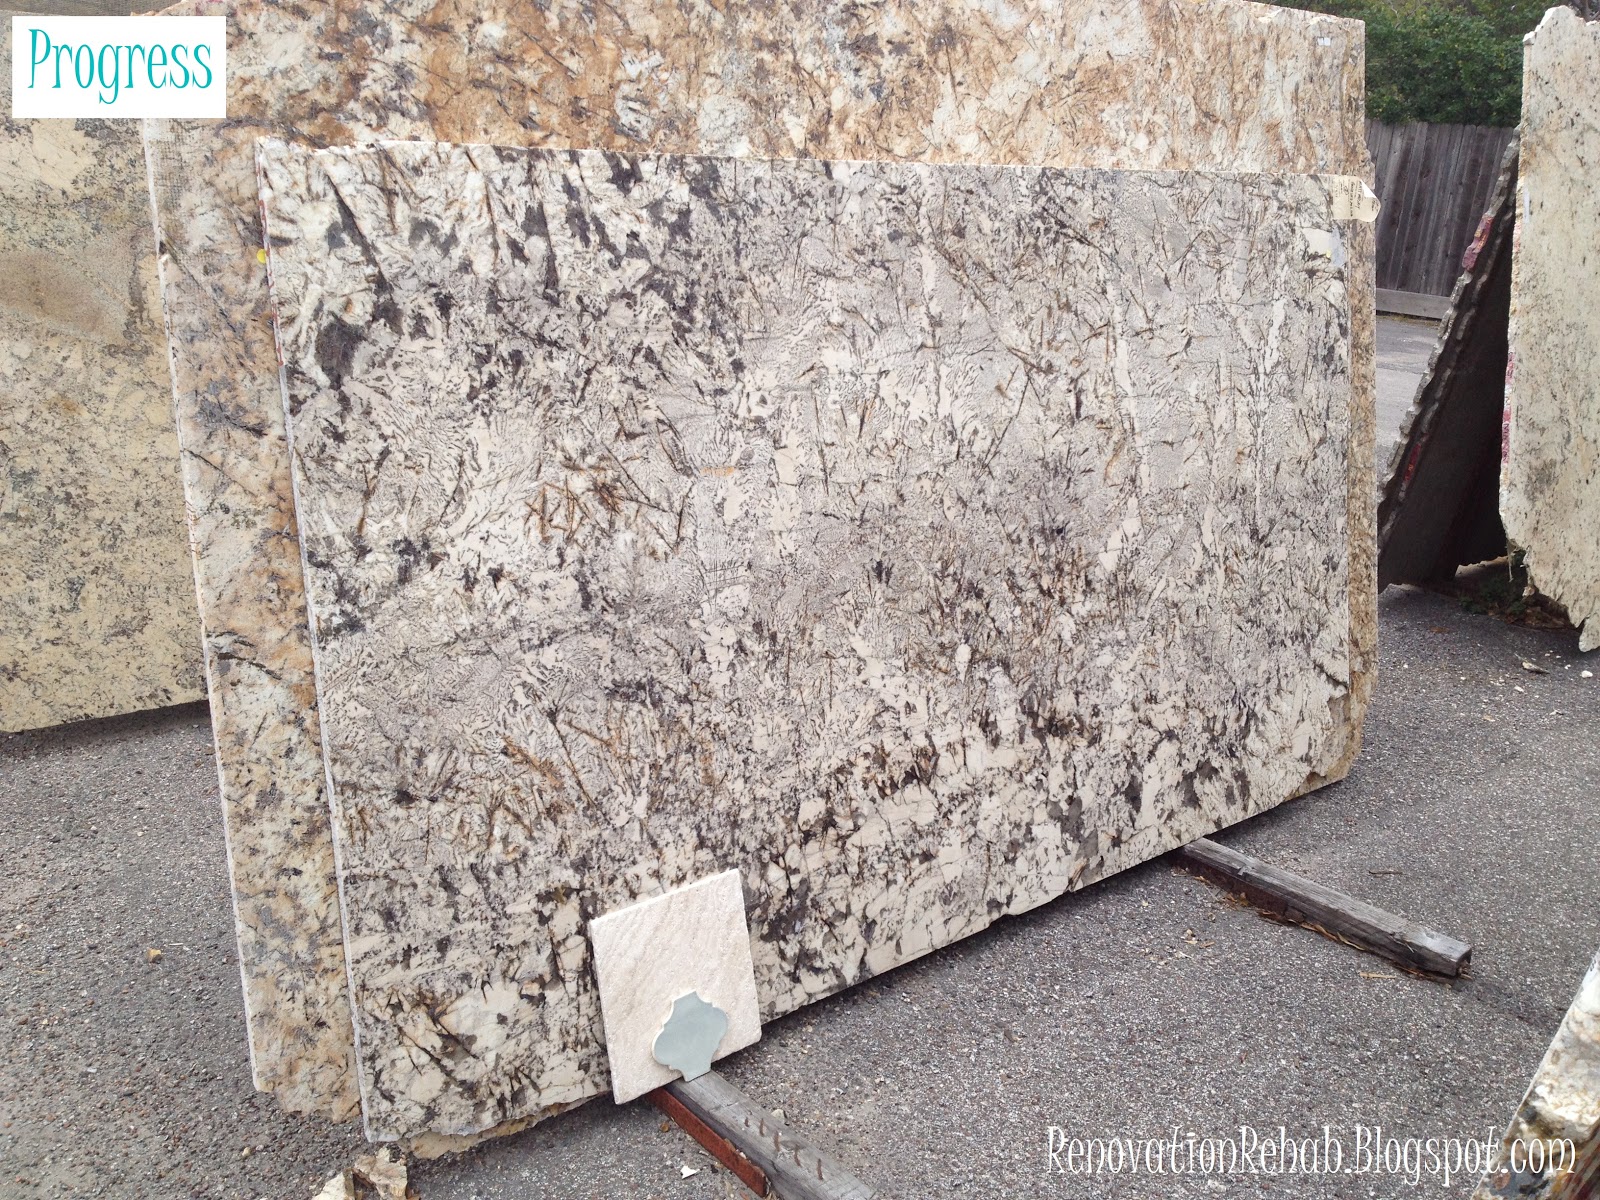
Our slab of stone arrived yesterday.  We chose a cream limestone overlay that will sit right on top of the existing brick. It is reading a bit yellow in this picture, but is much more cream in real life with just a bit of Edward-style sparkle (mmmmm....gotta love some good ol' fashion vampire sparkle): 

 
So now that we have the limestone and have removed the hearth, the next step was to cover the existing fireplace with a layer of skim coat to give it a nice even base for the limestone to overlay.  We also added a plug and a cable cord so that we can put a TV above the fireplace if we want in the future...and in the meantime, they will be covered with a painting, so our guests will be none the wiser of the electrical storm going on just out of eyesight.

 
That is as far as we have gotten.  I will pop by next week with an update on the final product.  I hope that everyone has a wonderful Labor Day weekend!!!  Thanks so much for stopping by!


Thursday, August 22, 2013

Selecting the Stain Color for Our Wood Floors

 
Happy Hump Day everyone!  I am so excited because Mattey-boy finally gets home tonight after being in the Deen for the past two weeks...and it looks like this might be his last trip over for quite some time (for those of you who don't know, he has been spending about 3 weeks+ each month in Aberdeen, Scotland since March for work and his tour-of-duty is finally over)! Yippy for me!!!  While he has been gone this past two weeks, I have moved onto our next major project at the casa, and that's refinishing our wood floors. This is a pretty huge undertaking and has a lot riding on it (literally) because we have wood floors in EVERY SINGLE ROOM of the house (other than the bathrooms and laundry room - I showed you the details here)...and let me tell you, that's A LOT of wood people! Although the vast majority of the floors are the original floors that were installed when the house was built in 1967,  we have expanded the front of the house, relocated the stairs,  moved a ton of walls, and also added on a whole new bedroom during this renovation....which means that we had to install new floors for each of these locations. Easy-peasy, right???? Just go pick up some matching floor at the flooring store and you are good to go?!?! Well, unfortunately, that is 100% wrong in this case. So let me explain, here is a picture of how the floors look currently (with a whole lot of drywall dust and apparently some kind of water (I hope) drop...yummy):
 
 
So, asides from all the drywall dust, we have two major issues.  First, flooring companies no longer make wood floors with the cute little pegs at the end...apparently those pegs actually held the boards down (and are more expensive) so have become obsolete.  Second, 47 year old floors are super tricky to match because 40+ years worth of love gives them a depth and character that you can not recreate with brand new, out-of-the-box wood floors...no mater how much they hand scrape them.  So our solution was to hunt for reclaimed wood floor that were the same or similar vintage...and we totally scored!!! Although the salvaged floors were completely different colors than our current floors, they are real wood and can be sanded down and restained to match.  In the picture below you can see a sample of the newly installed salvaged floors (the ones on the left side of the square) next to our existing floors (the ones with the pegs on the right side of the square), with a sample of stain that matched the original color...pretty impressive if I do say so myself!!!
 
 
So now that we resolved the "how do you match 47 year old floors" issue, it is time for the fun stuff - picking the stain color!!! Fun, fun, fun! The color of our original floors (as you can see in the picture above) was a redish-orangish-brown with dark pegs.  Although it looked super pretty, we have both been leaning towards the idea of darker floors throughout the house (1) to go with the dark trim that we have downstairs and (2) because we think that it feels just a bit more dressed up.  However, I didn't want anything that was too dark, because I didn't want to loose the pretty wood grain and variations in each of the boards. So I thought maybe a dark walnut stain mixed with ebony. I explained my vision to the floor guys and then played Goldilocks for the afternoon wading through the seven samples that they provided:


Starting from the bottom row on the right and moving clockwise, we had
  1. Antique Brown (too light and too yellowish-brown)
  2. English Chestnut (too light and too orange)
  3. Spice brown (getting darker, but not dark enough...although I loved how it really brought out the grain)
  4. Coffee Brown {closed grain*(love the tone and the effect on the grain, but still just a hair too light for my taste)
  5. Coffee Brown {open grain*} (definitely good on the darkness, but it felt a bit flat)
  6. Ebony {open grain*}(too dark because we completely lost the wood grain)
  7. 50% Coffee Brown & 50% Ebony {open grain*} (WINNER WINNER CHICKEN DINNER!)
 * Open grain means they wipe the wood with water before applying the stain to open the grain so more of the color soaks in...it makes a huge difference.
 
I absolutely fell in love with the 50% Coffee Brown-50% Ebony combination because (1) it provides the deep brown tone that I was envisioning with the Coffee Brown; and (2) the ebony stepped in to highlight the beautiful grain in each of the boards.  Here is a close up of the color (although the picture above it much more accurate depiction of the color...the color in the picture below is darker than the color in real life and there is more contrast)


So that is one more check on the ol' To-Do List!!! So exciting!  It is going to take the floor guys 10 days to finish the floors, but all the stain and first coat of poly should be down by Monday.  So stop by back to see the update!  I hope that you all have a wonderful rest of your week!!!


Oh, and just cause I am excited and because it's Thursday...I think it is time for a little Carlton!


Monday, May 6, 2013

Shopping for Granite and Carrara Marble

This weekend Matt and I did some of shopping and selected our granite and carrara marble slabs for the Guest Bath, the Master Bath, the Game Room Bar and the Living Room Built-In next to the fire place.  All of the cabinets for these rooms are stained a dark java color.  Here are a few of the cabinets for our Master Bathroom vanity post-delivery but pre-installation. 

 
All of the cabinets in our house are from Starmark Cabinetry that we ordered from a store called Factory Builders Store in Houston.  This is the same brand of cabinets that we used in our kitchen and absolutely adore the quality, finish, and detail that these cabinets provide.  (Oh and P.S., I have not been paid by either of these stores, but if anyone that works there is interested, please don't hesitate to contact me :-) ).  In the Master Bath, Living Room, and Game Room, we are going for more of a rustic look, so we chose the Rustic Cherry wood for the cabinets.  Rustic Cherry wood is different than plain Cherry wood because it shows natural holes and wear in the wood. 


Here


This is the same finish that we used for our kitchen cabinets.  However, we chose the Java stain for the Master Bath, Game Room and Living Room built-in, which is a bit darker than the sample cabinet above.  Java is effectively a super dark brown stain that looks nearly black, but still gives you the richness and warmth of a deep brown cabinet.  Also, it allows you to see the wood grain, which we would loose if we painted the cabinets black.


Here


Here is a closer look at our Master Bath vanity cabinets.


Since we are going for more of "elegant-rustic" look in the Master Bathroom, Living Room and Game Room, we were hunting for a creamy piece of granite with some dark accents throughout.  We found first found this piece of Delicatus Granite that we feel in love with.


The two pieces of tile in front are samples of the travertine tile and accent tile that we are using in the Master Bathroom.  The colors don't match that well in this picture, but in person they are spot on.  Unfortunately, however, this slab is only big enough for our Master Bath Vanity (it's 10 foot long).  They had another piece, but we didn't like it as much.  Although that was a bit frustrating at first, we quickly realized that we were excited about the idea of having different styles of granite throughout the house.  So we decided to keep hunting to see if we could find something similar but different.  After a bit of searching, we found this slab of Genesis Granite, which has the creams and brown tones that we need to match the built-in cabinets in the Living Room and Game Room, but is distinctly different than Master Bathroom slab. 


However, what makes this slab extra perfect is that it has some tiny specs of Maroon throughout...and for my die-hard Aggie husband, that was all he needed to be sold on the piece.  Next on our list was the Carrara Marble for the Guest Bathroom. We are going for an classic late 1900's early 20th century look for this room.  Here is my inspiration board that I showed y'all when I first revealed the Guest Bathroom plans.

 
As you can see, this bathroom is all about Carrara Marble.  We are going to use it on top of the cabinets and on the floor tile.  After wander through the warehouse, I quickly realized that all Carrara Marble is not created equal and the texture and color of the gray veining throughout the slabs can vary greatly.  It took some searching, however, we were eventually able to find a piece that matched our Bianco Carrara Marble floor tiles perfectly.


The slab was absolutely HUMONGOUS though!  As such, we only need about half of the slab for the guest bathroom vanity.  Since the granite store makes you buy the whole slab, however, we decided that we would use the remaining portion of the slab in the Laundry Room.  As I mentioned last week, I know its kinda crazy to use Carrara Marble in the laundry room...but since we would otherwise loose the remainder of this beautiful slab, we decided to throw caution to the wind and put it in the laundry room.  We are going to try and be careful with it, but I am just going to embrace the scratches or dings that will inevitably show up over time.  But hey, it will mean that it has been well loved and used. Well, that is all for our granite and carrara marble shopping trip.  I hope that you enjoyed it!  Thanks for stopping by and I hope that you have a great Monday!


LinkWithin

Related Posts Plugin for WordPress, Blogger...