Happy Friday everyone! I hope that you had a great week and have a fun weekend in store. We have a crazy one ahead of us with lots of Mardis Gras festivities. It will be busy, but a lot of fun! And I have to say, I am still super excited about getting the drywall up at the house and our doors. Can't think of a better way to kick-off the weekend than that!
So a few weeks ago I told y'all about the unplanned closet that Matt and I got upstairs because of some A/C reworking. And I don't know about you, but to me, getting an extra closet is like finding a pot of gold! As I mentioned, my first thought was to create a craft room/wrapping closet to wrangle all of my crafting and wrapping goodies. Well, unfortunately my super master plan all came to a screeching halt when Matt said that he thinks that we will need the extra closet to store random stuff that won't go anywhere else in the house. So that means, the only way I am going to get my craft room/wrapping closet is to get rid of some serious stuff around the casa. For those of you who don't know me, I have a tendency to hoard keep random stuff around and never throw anything away...and it drives Matt crazy. To actually get rid of enough stuff to be able to have an entire closet empty, is going to be a serious challenge for me! But I want that wrapping closet, so somehow, someway, I am going to make this happen. And to that I have to say "Well played Mattey, well played."
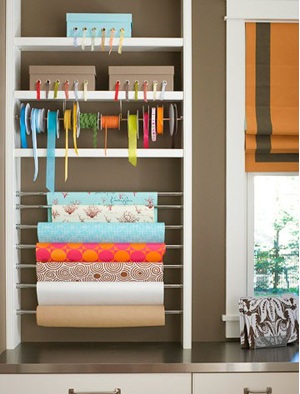
So now onto the layout. The closet is a small walk-in and is 5 feet wide by 4 feet deep. Since it is a little small, I want to put all the storage on the back wall of the closet. Here are a couple of my original inspiration pictures:
Aren't those spaces absolutely fabulous?!?!?!?! They make me smile every time I see them with all the bright colors and pretty cabinets. Those rooms are obviously much larger than the space that I have; however, they give a great starting point to get the creative juices flowing. I absolutely love the wrapping paper/ribbon holders in those photos. And I think the baskets are a great way to add in some texture. I also like the idea of having lots of drawers to store tissue paper, boxes, tags, scissors, etc. on the bottom of the closet. As I mentioned before, I think that Martha Stewart's flat filing cabinet will do just the trick. Here is what she looks like:
Once I figured out the basic elements that I want in the closet, I busted out my handy dandy graph paper and came up with this layout:
As you can see, I took the ideas from those absolutely fabulous inspiration rooms and tried to make them fit my space. In the middle of the closet, I will put the Martha Stewart flat filing cabinet. I have about six inches on either side of the cabinet, so thought this would be a great space to add some tiny shelves to store seasonal wrapping paper that I can display up top when its the right time of the year. Above the flat filing cabinet, I plan to add a some dowels so that I can hang all of my ribbon. The Martha Stewart flat filing cabinet is pretty deep, so I should still have plenty of room on top for a good work space. Above the ribbon, I plan on putting some more dowels for my wrapping paper. On either side of the wrapping paper, I will have open shelves where I can add some pretty baskets for all of my crafting goodies. I also want to add a fold-out table on the closet door so that I can have an extra worktop for wrapping large presents. This is what I have in mind:
 |
| Here |
I found this sweet one online that looks fun and has additional storage behind the table:
 |
| Here |
However, the whole contraption will have to be fairly light since it will hang on the door instead of a wall. So I think that we will probably have to build it ourselves, which should be fun! So that is all for now. I hope you have a great weekend and thanks for stopping by!!!


No comments:
Post a Comment