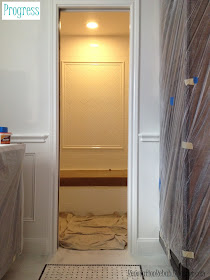
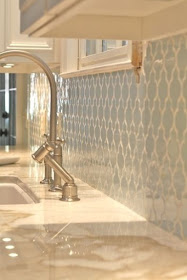
Happy Monday everyone! I hope that you had a wonderful and relaxing weekend. Things were busy here in Houston, but very productive at the house. As I mentioned last week, not only is painting in in full swing at the casa, but the tile in the upstairs guest bathroom is finally being installed and I am super excited to show you how it is turning out! Back in May, I introduced you to our oh-so-loverly guest bathroom and gave you the low down on my plans to give our tiny little "Ode-to-1960's-Wallpaper-and-Tile" guest bath a cool vintage makeover and bring her into the 21st century via the 1920's. I also showed you the newly installed cabinets in my Vintage Bathroom Remodel - Part 2 post here. But, just to jog your memory, here is the layout of the original bathroom below highlighted in yellow:
As you can see, it was a small three piece bath with a single sink, a toilet and a five foot tub. And here are some shots of the bathroom in all her 1960's wallpaper and tile glory:
The first picture shows the view into the bathroom from the hallway. And this next picture is a view of the toilet and tub (with my back towards the vanity):
Although the bathroom had a fun 1960's vintage feel...it was the wrong era for my vision and just too small. In order to allow two people to get ready in the bathroom at the same time, we decided to expand the bathroom so that we would have a vanity room and a separate shower room. The floor plan below shows the new bathroom highlighted in yellow (with a pocket door that can separate the shower room from the vanity room).
After resolving the space and layout issue, my next task was to create a mood board so that I could see how all the different design elements worked together. This is my original mood board that I created for our "vintage guest bathroom (circa 1920) with a hint of modern flare":
One of the major design elements that I wanted to incorporate into the vanity room was a "tile floor mat" using a combination of basket weave carrara marble tiles and 12"x12" carrara marble tiles. The "tile floor mat" in this picture was my original inspiration for the space:
However, in order to work for our guest bathroom, I had to modify the design of the "tile floor mat" from a rectangle to a large "T" shape. This drawing shows the placement of the vanity and linen cabinets as well as the layout of the "tile floor mat" in the vanity section of the guest bathroom:
And here is how the floor looks installed:
I am so excited how it turned out and absolutely LOVE, LOVE, LOVE it!!! It is exactly what I envisioned and feels so crisp and clean! Here is another view where you can see how the floor works with the vanity, linen cabinet and wainscoting:
Happy days, happy days, happy days!!! The shower room section of the guest bathroom was too small for a similar floor mat; so we decided to carry the 12"x12" carrara marble tiles throughout that space. You can see the shower room highlighted in yellow below:
To keep with the vintage feel in the shower room, I chose white subway tiles for the shower surround. However, with the white carrara marble floors and white subway tiles, I was afraid that the space might end-up looking a bit too institutional with all the square lines. So, to break things up, I added a herringbone feature to the back wall of the shower surround, which is illustrated in the drawing below:
I also made sure that the herringbone feature was centered on the pocket door between the vanity room and the shower room so that our guests would see it regardless of which part of the bathroom they were in. This is what she looks like installed (and please note that the herringbone feature is centered on the door, I was just standing at the wrong angle when I took the picture):
Again, I am LOVE with how it turned out!!! The white subway tiles are so bright and cheery and the herringbone feature adds just enough interest and spice keep the space from being boring! Here is a close-up of the herringbone feature. J'adore!!!
I am so giddy-like-a-school-girl with how everything is coming together!!! It totally makes all the heart-ache and stress of this year-long remodel fade into the background when I get to see my visions come to life! Here's to hoping that I am going to be as in love with the rest of the remodel as things continue to progress!!! I hope that you are enjoying the progress and updates as much as I am. But before we go, let's have one more look at the the before and after (well, progress) pictures!
SO much better!!! Thank you so much for stopping by and have a wonderful week!
UPDATE: CLICK HERE TO SEE AN THE FINAL BATHROOM!
I have linked this post to Our Delightful Home, It's So Very Cheri, The Blackberry Vine, Him & Her, Funky Polkadot Giraffe, A Stroll Thru Life, Today's Creative Blog, Coastal Charm, A Diamond in the Stuff, Ladybug Blessing, A Bowl Full of Lemons, Elizabeth & Co., Hope Studios, Sugarbee Crafts, Nap-Time Creations, Salt Tree, The Winthrop Chronicles, My Repurposed Life, For the Love of Family and Home; Design, Dining and Diapers


.jpg)


.jpg)
.jpg)
.jpg)
.jpg)
.jpg)
.jpg)
.jpg)